Whenever I think back to my time in Peru, I’m instantly filled with a warm nostalgia and a deep longing to return. Although I travelled around Peru for over three weeks, the four days I spent on the Inca Trail were amongst the most memorable.
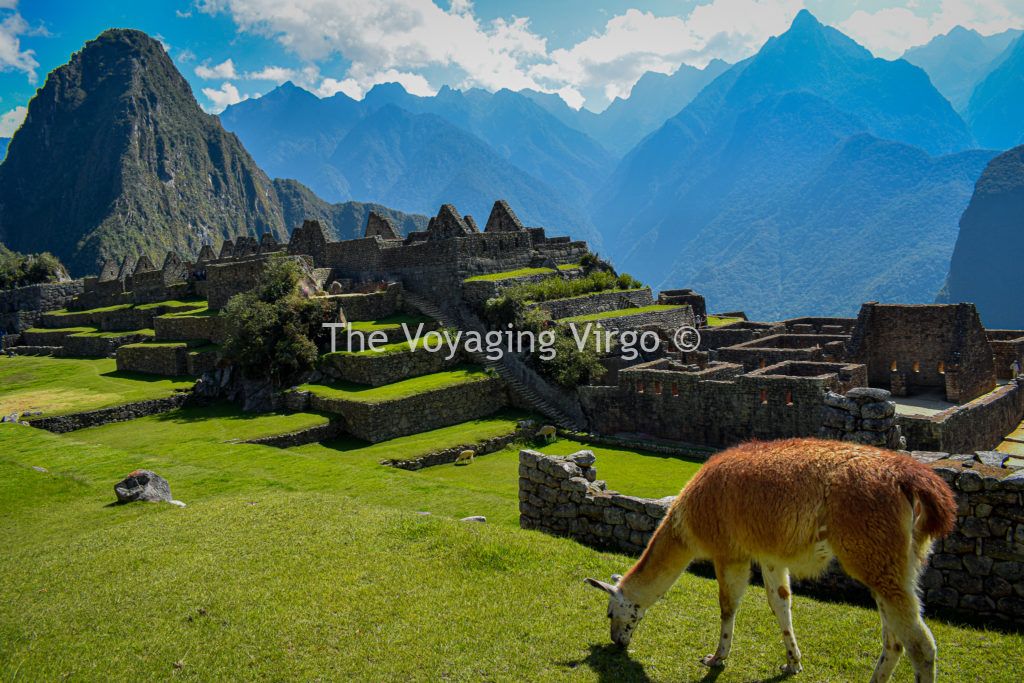
Like many, Machu Picchu had long been high on my list of places to visit and it was every bit as breath-taking and enchanting as I had imagined it would be. However, rather surprisingly, the ancient marvel itself was not the highlight of my trip…
About Machu Picchu and the Inca Trail
Machu Picchu is a 15th century ancient Incan city located in South-Eastern Peru. Its intricately carved stone terraces are nestled at 7,982 feet (2,430 meters) in the Urubamba Valley, high in the Andes Mountains. It is believed that Machu Picchu was constructed in around 1450AD as a royal estate and summer retreat for the Inca emperor Pachacuti and his entourage but was later abandoned by its occupants during the Spanish conquest.
Although local indigenous communities have long known of its existence, it was ‘rediscovered’ in 1911 by American academic and explorer Hiram Bingham during a Yale University expedition. Today, Bingham is credited as bringing Machu Picchu to the attention of the wider world, making it a one of the most popular tourist attractions drawing over a million visitors each year. Bingham is also believed to be the real-life inspiration behind Spielberg’s iconic fictional character Indiana Jones!
Engulfed by the surrounding jungle, the ruins were once only reachable by traversing through dense forest and mountainous terrain. It has since been restored by archaeologists and today is far more accessible by the comfort of public transport.
However, many travellers like myself visiting the region continue to opt for the scenic route, undertaking the challenging four-day ancient pilgrimage through the Andes to reach the site – and there’s very good reason why.
As awe-inspiring Machu Picchu is, a large part of its majesty and mysticism lies in re-tracing the journey of those who so skilfully paved the ancient pathways over five centuries ago.
Arriving at Machu Picchu is a reward which must be earned in sweat, aching muscles and for some, tears! For me, arriving at the ancient citadel after a four-day, leg busting trek through undulating Andean landscapes made finally setting my eyes upon the world wonder that much sweeter.
Passing through some of the most surreal and beautiful landscapes I have ever seen in my life whilst being completely disconnected from the outside world allowed me to be fully present in nature. Having fantastic, knowledgeable guides accompany us and teach us about the history, Inca & Quechua culture and local flora and fauna also really enriched my experience.
In all honesty, the journey, bonding with my fellow hikers from all over the world and the collective anticipation and excitement we each felt leading up to our arrival at the Sun Gate were all an integral and memorable part of my time in Peru. I’m not quite sure it would have had the same impact had I simply taken the train straight to the ruins.
There are a couple of ways to reach Machu Picchu which I discuss below, but if you’re in relatively good shape, I urge you to spend a few days in Peru and hike the Inca trail (or other equally impressive alternative routes). It will without a doubt enhance your experience compared simply taking the train up as I truly believe that a large part of the magic of Machu Picchu is in the hike to reach it.
History of the Inca Trail
The Inca Trail forms part of a larger ancient network of trails stretching more than 23,000 kilometres and connected the Incan empire (known as Tawantinsuyu) which covered present day Ecuador, Bolivia, Peru, Chile & Argentina.
The ancient stone pathways once allowed the Inca to travel from one corner of their vast and expansive empire to the other in order to transport food, goods & animals as well as send communications via running messengers known as Chaskis.
The modern-day Inca Trail, refers to a 42km long stretch popular with backpackers and takes you along a small section of that vast network on a breath-taking (both literally and figuratively!) journey through the mighty Peruvian Andes and ends at the Inca Sun Gate (Inti Punku) overlooking the ancient Citadel.
What’s so unique about this trek is just how much you get to see and experience over the course of 4 days. In just 42km, you’ll cross rolling rugged terrain, passing through several ecosystems and climactic zones including cloud forest, alpine tundra and mountain passes. It’s mind-blowing just how drastically the landscape and climate changes over a relatively short distance.
The Inca Trail is also the only hiking route which ends at the Inca Sun Gate overlooking Machu Picchu allowing you to walk down to the ruins at sunrise ahead of the crowds coming up by bus from nearby town Aguas Calientes. All other treks end elsewhere and require you to enter the archaeological park via the main entrance with everyone else.
Inca Trail Permits
Hiking the Inca Trail has become very popular over the last few years. Due to soil erosion caused to the path by the influx of tourists wanting to undertake the hike, the Peruvian government has placed a limit on the number of hikers permitted on the route per day.
Therefore, to complete the classic Inca trail, hikers must obtain a permit which, due to their limited numbers, get snapped up rather quickly. I booked my trek nine months in advance as I was travelling in the high season. Alternatively, there are several alternative treks you can complete which do not require a permit.
Permits can be obtained when you book your trek through a recognised tour operator. They will arrange for the permit on your behalf as you’re not allowed to complete the trek independently.
When to Complete the Inca Trail
May to October marks the dry season in the Andean region of Peru and is a popular time to do the trek. I opted to complete the hike in late August/ early September. Although it was technically still peak season, I hardly encountered others on the trail. We had one bout of rain in the evening and that was all. The remaining time it was pleasant weather with blue skies.
If you’re travelling outside of these months, avoid February as the trail is closed for the entire month for maintenance.
How to Book the Inca Trail
There are several tour operators taking groups out on the trail. The big international ones include G Adventures (who I went with), Intrepid, Exodus & Contiki. Alternatively, you can book with smaller local operators such as Alpaca Expeditions.
The price, quality and service provided will vary between tour operators so be sure to do your research. G Adventures aren’t the cheapest but the quality of their guides, equipment and overall service provision was fantastic and I really felt in safe hands.
Pre-Departure Meeting in Cusco at G Adventures’ Office.
If you choose to complete the trek with G Adventures, you will have a pre-departure meeting at the G Adventures offices a few days before the trek. Here you will meet your trek guide, receive a briefing on what to expect on the trek and general safety advice as well as the opportunity to ask questions and to hire any equipment you may require. They also had an example camp set up so you can see what the tents and sleeping arrangements will look like.
G Adventures allows hikers to hire sleeping bags, hiking poles and sleeping mats at an additional cost. I advise doing this rather than buying and carrying your own equipment, it’s just easier and isn’t very expensive.
Bear in mind that there is a strict luggage allowance on the Inca trail of 7kg per hiker which includes your sleeping bag and mat. You will be provided with duffle bags by your guide for storing any additional belongings. Factoring in your sleeping bag and mat, you will have around 2kg remaining for these additional items. The bags will be labelled with your name and carried by porters on the trek who will ensure the correct bag is delivered to the correct tent before you arrive at camp each evening. Anything you are unable to fit in these bags, you will have to carry yourself in your own backpack.
I can’t speak for other tour operators, but I imagine they will offer a similar briefing ahead of the trek departure.
The Inca Trail
Day 1 – Depart from Ollantaytambo
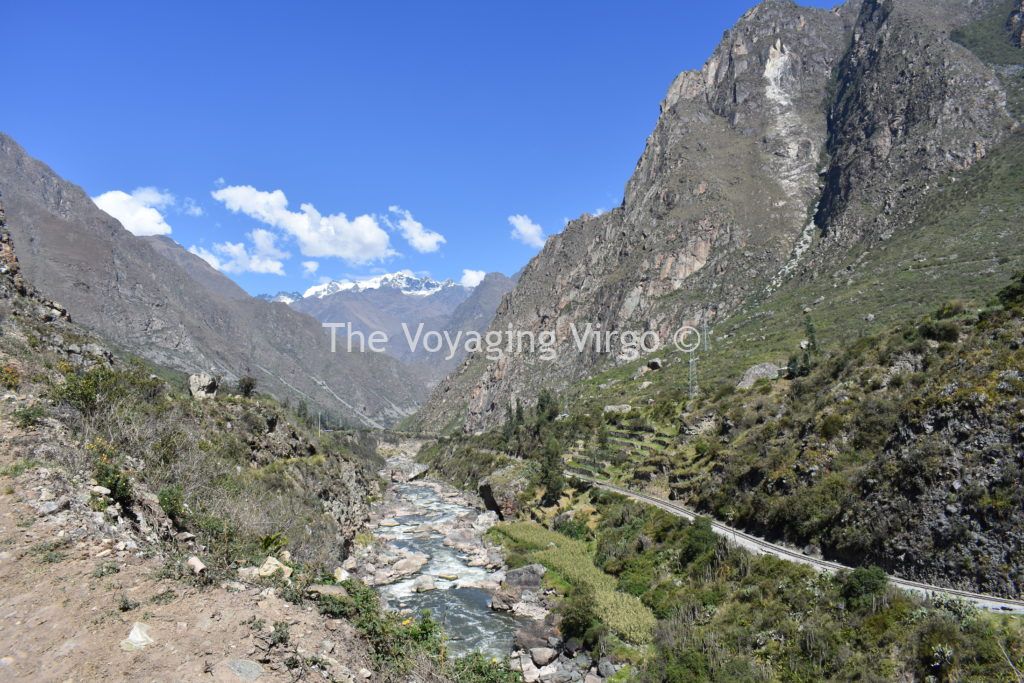
Those opting to hike the Inca Trail will travel from Cusco to the historic town of Ollantaytambo where you will spend the night before setting off on the trek the following morning. This also where the train to Machu Picchu leaves from.
On the morning of the trek, we awoke early to board a coach which took us to the starting point of the Inca Trail known as Kilometre 82.
Upon arrival, we spent an hour getting ourselves ready. There were toilet facilities for anyone who needed to go and our duffle bags were weighed by our guides before being handed over to the porters. Any bags over 2kg in weight had to be re-packed with the hiker having to take on any excess weight in their own backpack.
We were also handed out small snacks such as chocolate bars, crisps and fruit to last us for the whole trek which we diligently stashed away in our backpacks. The porters had a head start whilst our walking group congregated by the infamous Inca Trail sign where we took our obligatory group photo in our sparkly clean hiking gear before heading through the entrance gate into the National Park and official Inca Trail route. (You will need to carry your passport with you as permits and passports are checked before allowing entry into the park.)
Right from the get-go we were greeted with beautiful scenery. We gently climbed up though a winding stony path etched out in the side of the mountains accompanied by the sound of the gushing Urubamba River and soaring ice capped peaks.
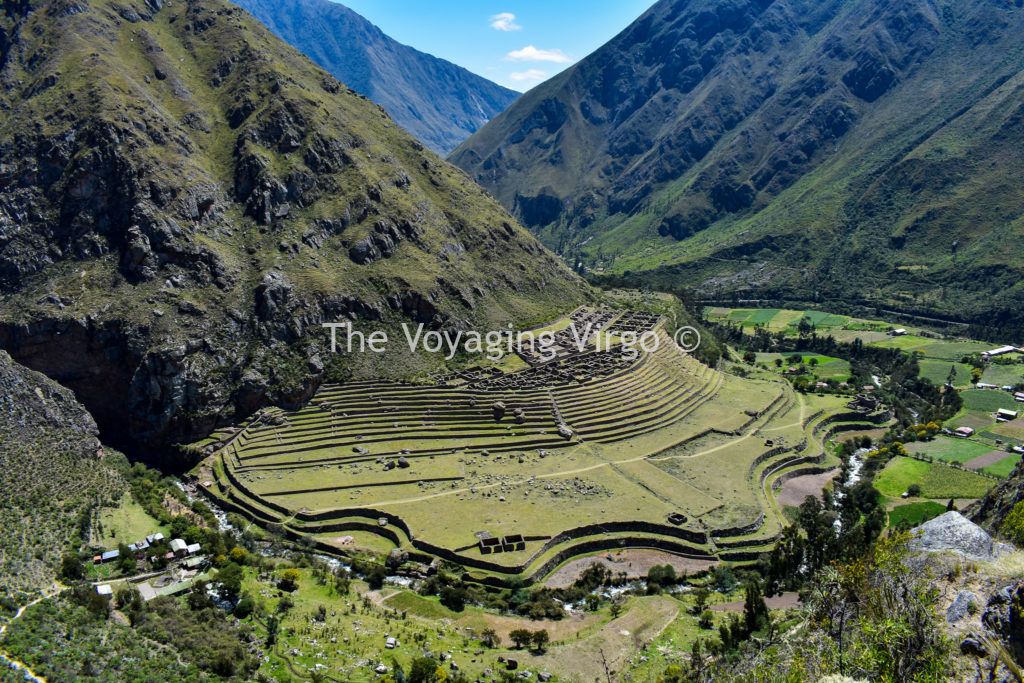
Still adjusting to the altitude of the region, many of us became winded pretty quickly but this wasn’t an issue as we frequently stopped for water breaks with ample opportunity to catch our breaths. We also encountered the first of many Inca ruins of the trek, Patallacta.
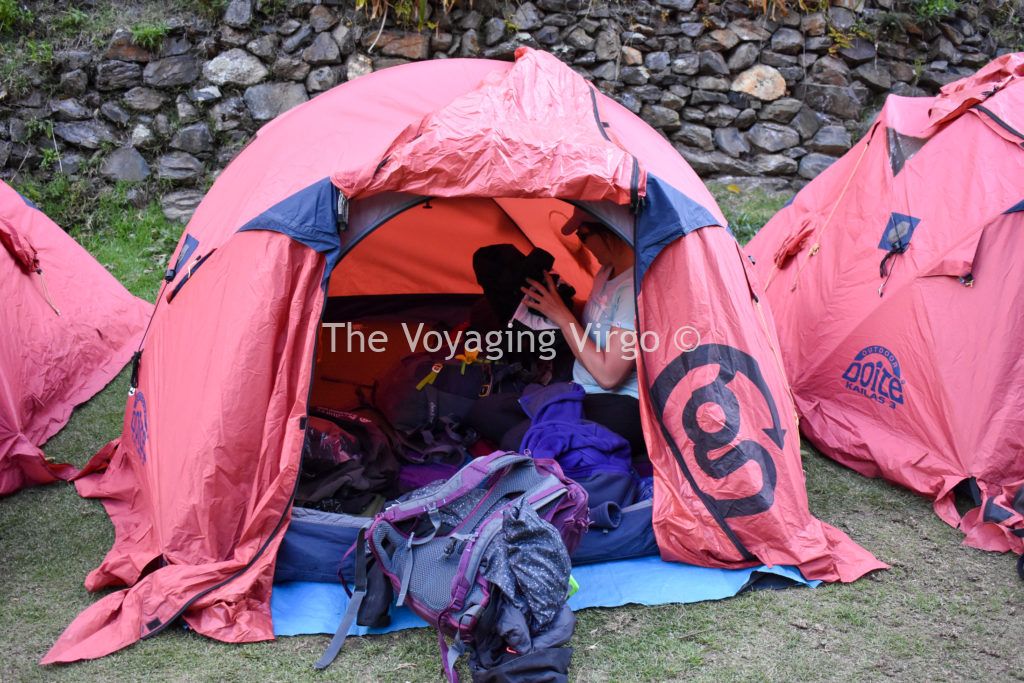
After a few hours of walking a gentle ascent, we arrived at camp late afternoon, with our tents already set up by the porters who had raced ahead of us.
After an hour or so to chill out, we were summoned to the dinner tent made up of a long dining table lovingly laid with traditional Peruvian woven tablecloth, plates and cutlery. We were presented with a freshly prepared 3 course meal and our guides were very attentive to everyone’s dietary needs.
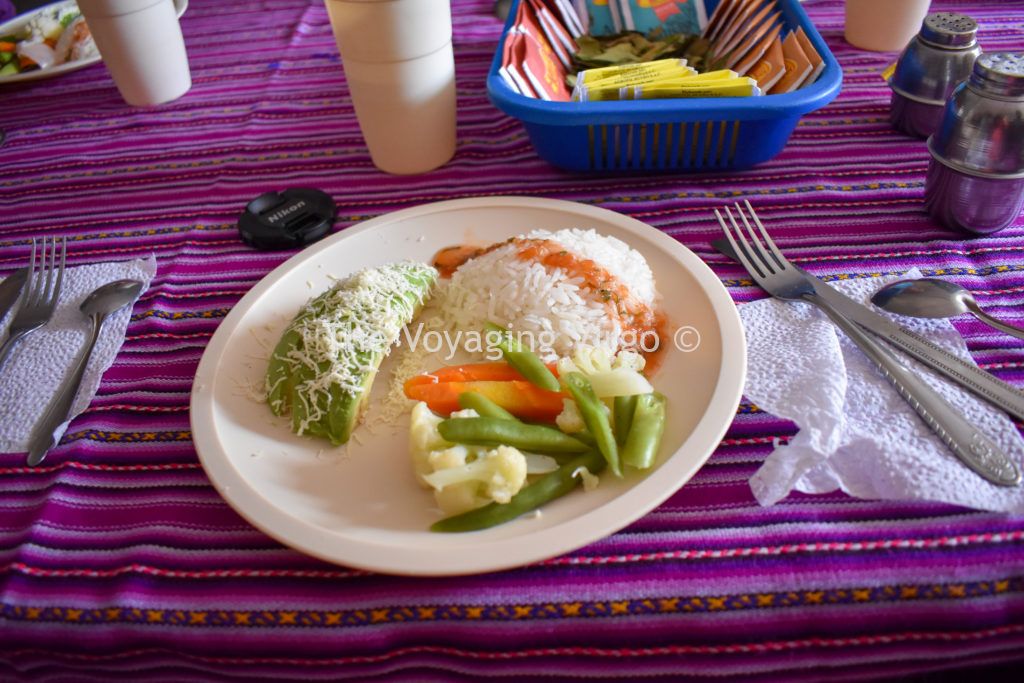
After some conversation and laughter over dinner with our fellow travellers and guides, we headed off to bed for a very early night, ready for an even earlier start the following morning.
Day 2 – Ascent to Warmiwañusca (Dead Woman’s Pass)
We awoke early with around 45 minutes to get dressed and have breakfast before departing for the second day of hiking. Although there are showering facilities on the trek, most people chose not to just because of limited time and the freezing cold water! I carried wipes and used these instead.
Breakfast included teas and coffee, bread and hot quinoa porridge, which went down very well with everyone.
Mornings on the trek were crisp but not cold. I generally only needed to wear a light fleece as it would begin to warm up quite quickly once the sun came up.
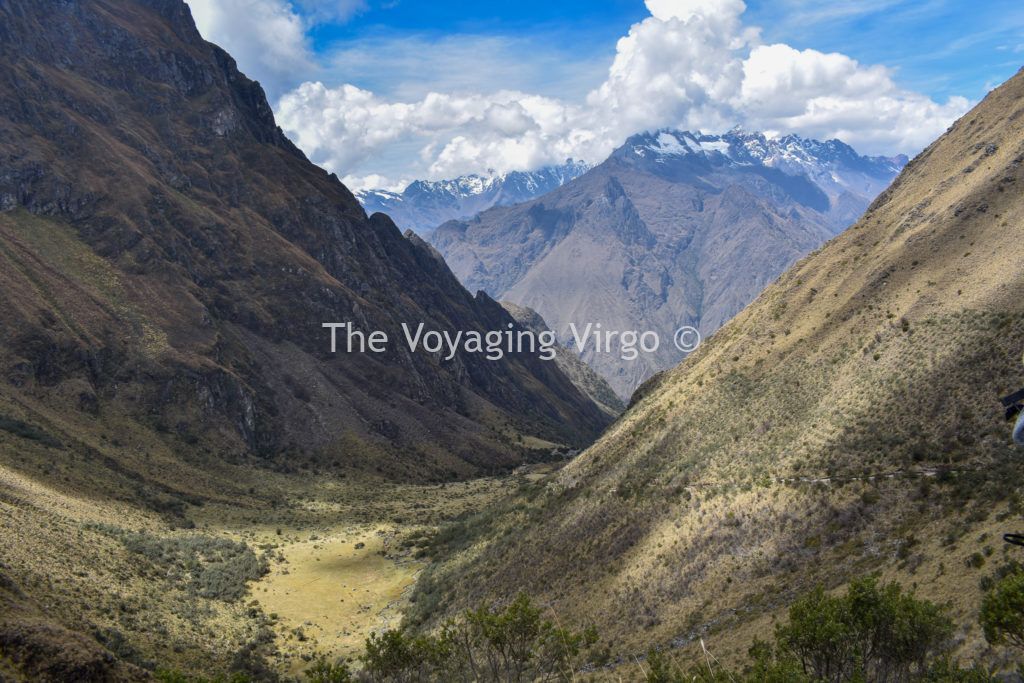
Day 2 was the most challenging day of hiking and where most people fell victim to altitude sickness as it’s the day we trekked to Dead Woman’s Pass, the highest point on the trail at 4,198m (13,769 ft).
This stretch of the trek was mainly uphill and took around 8 hours. I noticed a dramatic change in landscape from the previous day as the lush greenery and snowy peaks turned to rugged mountainous tundra. Given the high altitude, the climate felt a bit cooler than the previous day.
As we ascended, the air became thinner and I noticed myself feeling out of breath much quicker. I found pacing myself, drinking lots of water and taking regular breaks helped to deal with this.
Once we reached the top of the pass, we spent a good few hours descending which was equally challenging as the steep inclines were harsh on our knees. This is when my hiking poles really came in useful to relieve the pressure on my knees and avoid injury.
We arrived back at camp early afternoon with a few hours to relax before dinner.
Day 3 – Cloud Forest
The third day is the last full day of hiking and was personally my favourite day of the trek as once again, the terrain changed dramatically. From mountain passes and alpine tundra, this day takes you through lush, humid cloud forest. The temperature warmed up and the scenery became more verdant.
Hiking through two mountain passes, we were able to see some spectacular views of the Urumbamba Valley and began to sense that we were drawing ever closer to Machu Picchu. We passed through some Inca tunnels carved out of the rock and visited some of my favourite ruins of the trek, Phuyupatamarca, translated as the town above the clouds and Winaywayna, which means Forever Young and felt almost like a miniature more tranquil version of Machu Picchu.
In usual fashion, we arrived in the afternoon with a few hours to chillout before dinner. We then headed to bed in preparation for an extremely early 3am start to make our way over to Machu Picchu archaeological park.
Day 4 – Arrival at the Sungate and Machu Picchu
We awoke at 3am for the final stretch of hiking. Although we were only walking for a few hours this time, we were doing it in the dark. Head torches were therefore indispensable as we scrambled our way along the uneven stone paths.
I can’t begin to describe to you the serenity of walking through the mountains just as the sun is beginning to rise from behind the mountains. The rich colours of the morning twilight, the sweet mountain air and nothing but the sound of birdsong and the dirt crunching under your hiking boots – It’s truly sublime.
The early wake up was to ensure we arrived at the entrance of the archaeological park before the other trekking groups and to get down to Machu Picchu before the gates opened up to the public. Of course, the other groups had the same idea so when we arrived, we were met with a long queue of hiking groups waiting to get in.
We arrived at around 4.30am where we waited for around an hour for the gates to open. Once through, we hiked for a further 1.5 hours before we were met with our final hurdle– a narrow, practically vertical set of stone steps leading up the Sun Gate lovingly named by locals as the ‘Gringo Killer’. Manoeuvring this final obstacle course required me to get on all fours and clamber my way up to the top, but it was all a part of the adventure!
As I reached the top in time for sunrise, I was met with my reward – a glorious golden hue slowly cascading its way over the mountains and down into the valley. Within seconds, bathed in the sun’s golden rays, the ancient city revealed itself like a mirage from the clouds as we all just stood there in awe, taking it all in.
This was a really special moment and one I will remember for the rest of my life. It’s also something I would not have experienced had I not completed the trek.
After half an hour or so to enjoy the view looking down on Machu Picchu, we made our way down the mountain which took another hour.

As we had arrived early, we had around 30 minutes at Machu Picchu before the main gates opened to the public. We seized this opportunity to get some great photos without lots of tourists in the way. We then proceeded to explore the ruins with our tour guide and then alone. We had around 2-3 hours to explore the site before making our way to the bus station outside the park entrance to catch the bus back down to Aguas Calientes, drawing our epic 4-day adventure to a close.
From here we caught the Peru Rail train which offers travellers a stunning panoramic view of the Sacred Valley, back to Ollantaytambo. From there, were took a bus back to Cusco where we arrived late in the evening.
Baggage Allowance on the Inca Trail
Most tour companies employ porters to carry the cooking equipment, tents and belongings of hikers. They work extremely hard carrying huge packs on their backs up the mountain. In order to protect their health and wellbeing, the Peruvian government has placed limits on how much they are permitted to carry. As such, there is a 7kg limit per hiker. This includes your sleeping bag and mat leaving around 2kg for your remaining belongings such as clothes and toiletries. You will have to carry anything in excess of this yourself.
Bags are weighed at the beginning of the hike to ensure they meet this requirement. You should therefore pack accordingly and only pack what you need.
I recommend packing anything you will need during the day in your day pack and everything else in the duffle bag you will hand over to the porters as you won’t have access to this until you arrive at camp at the end of the day.
Difficulty & Training for the Inca Trail
This trek is uphill and at high altitude but is not overly difficult provided that you are in good shape. I would advise doing some cardio a few months before the trek. I did some running at an incline at the gym a couple of times a week to prepare myself and felt like this really helped me. Just going for regular walks around your local area is also great preparation.
I also recommend taking altitude sickness pills (Diamox) a few days before you arrive in Cusco. I think these helped a lot as I didn’t suffer from altitude sickness at all, just a bit of breathlessness. In the UK, Diamox must be prescribed by your GP so be sure to speak to your doctor well in advance of your trip.
What to pack for the Inca Trail
1. Clothing
Dressing in layers on the Inca Trail is key. Mornings and evenings can be a little chilly, but you begin to warm up as the day progresses and you start hiking. The climate also varies depending on the altitude you’re at so it’s ideal to carry thin layers which you can easily take off and put in your bag.
If you think you need to buy an extra layer, there are outdoor clothing shops in the Plaza de Armas in Cusco where you can get any supplies you need. As mentioned above, you can also rent items like sleeping bags and hiking poles from your tour operator so there is no need to purchase these. I recommend the following items for the trek:
- 2 quick drying t-shirts plus the one you will be wearing – Gym t-shirts are perfect for this. I bought mine from H&M. They were cheap and did the trick. You can get them from anywhere that does sports or gym wear such as Primemark, Sports World etc.
- 2-3 Pairs of quick dry gym leggings.
- A worn in, comfortable and waterproof pair of hiking boots – The key here is that they are worn in. Don’t wear brand new boots they will only give you blisters! I highly recommend some boots with ankle support. They were a life saver for me going up and down steep uneven paths as it very easy to roll or sprain your ankle. Ankle support helps to prevent that from happening. I bought my boots at a very reasonable price from Go Outdoors. That exact style is no longer available, but I have linked a very similar pair here.
- Hiking socks to absorb sweat and prevents blisters – I bought mine from Mountain Warehouse
- A light waterproof jacket – I usually recommend purchasing a 3 in 1 jacket as this can be used in all weathers. I bought mine from Mountain Warehouse and simply detached the inner lining leaving the thin outer waterproof shell.
- Merino Wool Top to wear at night and to bed
- Fleece lined thermal leggings – for wearing in the evening and to bed when it gets cooler
- A fleece in case it gets cooler in the evenings
- Underwear- 4 pairs of underwear and a bra.
- Warm hat and gloves for the evenings.
2. Toiletries
- Small Toothpaste & Toothbrush
- Toilet roll and sanitary products.
- Small first aid kit – Containing Altitude Sickness tablets, Immodium, paracetamol, blister plasters, hand sanitiser, plasters, antiseptic wipes, rehydration sachets (dioralyte), pocket tissues and the usual medications you take.
- Small shower-gel and shampoo – If you’re planning on showering. No one in my group did.
- Baby wipes – to wipe yourself down if you’re not planning on using the showers.
- A small bottle of antibacterial hand wash
3. Miscellaneous Items
- A sleeping bag liner – It’s just nice to have a barrier between you and the rented sleeping bag. It’s not necessary but I like to have one.
- A backpack with a rain cover – I took my 18-litre Lowe Alpine AirZone day-pack which I absolutely love. It’s the perfect size for my short stature and fits perfectly to the female form to distribute weight evenly onto your hips instead of your back and shoulders. It also has a breathable back which stops your back from getting sweaty and wet. It didn’t rain when I was completing this trek but it may do depending on which time of year you go. This is similar to my backpack.
- A microfibre towel – these are great for trekking, they are small, compact and quick drying
- Either a water bladder or 2 large water bottles (You don’t need both) – whichever you opt for, just ensure they fit to your chosen backpack size/ pockets. Alternatively, you may want to invest in a water bladder to avoid having to keep taking your bottle out of your bag. Again, make sure it fits to the size of your backpack.
- A dry bag for your electronics in case it rains
- Head torch with spare batteries– there is no electricity and it’s gets pitch dark at night so a head torch is vital for getting around camp
- Earplugs – if you’re a light sleeper.
- Camera/ Phone/ Kindle with fully charged batteries, cables and a portable charging pack –
- Money for buying drinks and snacks along the way.
Alternative Treks to the Inca Trail
If you are planning a more spontaneous trip or you have been unable to obtain a permit for the Inca trail do not fret, there are other alternative treks which can be undertaken that offer equally stunning landscapes.
One thing to note however is that the Inca Trail is the only trek that terminates at Machu Picchu meaning that on the final day, you will arrive via the mountains overlooking the ruins and will be among the first visitors to arrive at the site before the gates open to the general public.
Most groups arrive in time for sunrise, so you’ll be one of the lucky few to see the sunrise over the Machu Picchu from the Sun Gate. The other treks follow routes in the area but do not end at the ruins meaning you will need to get the bus up to the entrance from Aguas Calientes like the other tourists visiting for the day.
- The Lares Trek – This trek takes you through local Andean villages, snow-capped peaks and hot springs. It is 34km in distance and takes 3 days to complete. At the end of the trek you will need to take the train from Ollantaytambo to Aguas Calientes and the bus up to Machu Picchu. This is a good option if you would like to experience Andean culture and meet local villagers.
- The Salakantay Trek – This a challenging trek which takes you to high altitudes up to the Salakantay Pass and then down into the jungle. It is 51km in distance and takes around 5 days to complete. You’ll see some spectacular mountain scenery, and this is a popular alternative to the Inca Trail.
- The Inca Jungle Trek – If you’re looking to add an extra layer of adventure to your trek, the Jungle Trek includes activities such as zip lining, river rafting and mountain biking.
Other options include the Choquequirao, Ausengate & Vilcabamba treks.
There are several local tour operators who offer a variety of treks, so be sure to do your research before booking.
Is Huayna Picchu worth climbing?
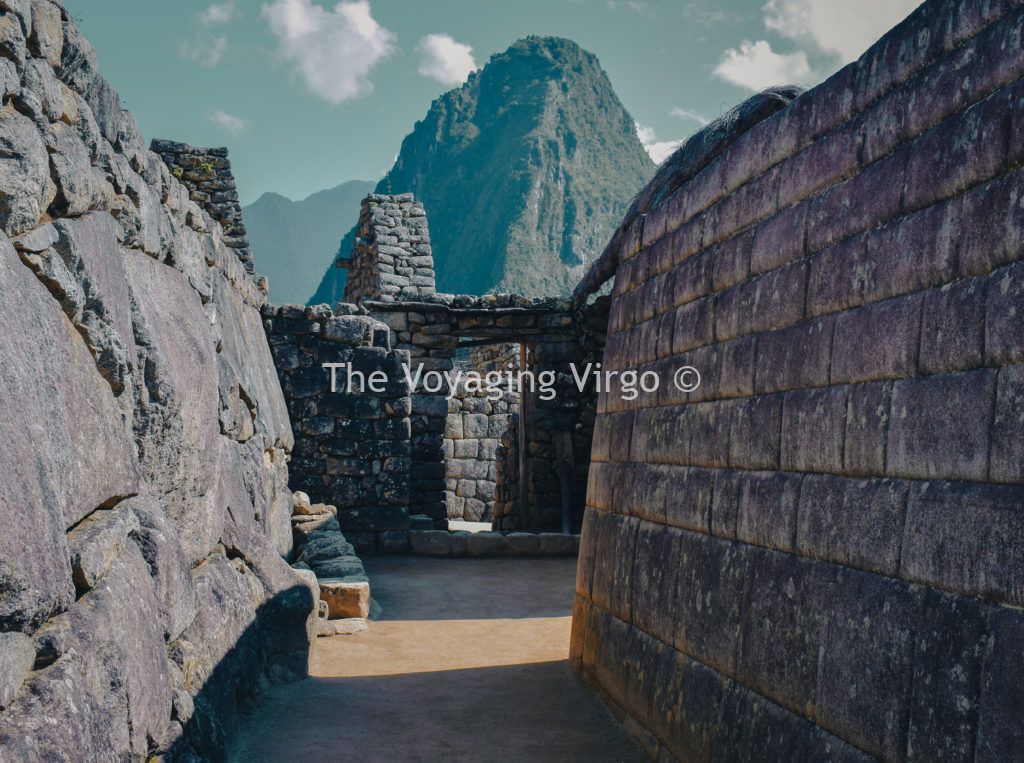
Huayna Picchu is the name of the famous peak which towers over the city of Machu Picchu. It is open to tourists to climb but requires a separate ticket which must be booked in advance.
I personally didn’t climb the mountain as I didn’t have a ticket, but members of my group did. They advised that the views were spectacular however it is a very steep climb and not suitable for anyone with a fear of heights.
There have also been concerns about the safety of the climb given the narrow pathways and sheer drops but it’s not personally something I can comment on. Something I did however notice on the Inca Trail and at Machu Picchu itself were the number of sheer drops and lack of railings or warning signs. You are responsible for being vigilant and looking after your own safety. A failure to do so in the past has resulted in deaths at the site, so do bare this mind if you choose to complete this climb.
Other Useful Tips
- Baggage – You can store your other baggage at the hotel you’re staying with or at the offices of your tour operator. Be sure to enquire about this before booking.
- Tipping – Tipping is a big thing in Peru and your guides and porters will expect a tip at the end of the trek and in all honesty deserve you when you see just how much they carry on their back. How much you tip is entirely up to you.
- Insurance – Be sure to check that your travel insurance covers hikes at this altitude in case the worst should happen.
- Entry Ticket and getting the bus back down to Aguas Calientes – This will be arranged by your tour guide and is usually included in the price of the tour but be sure to double check when booking.
- Camping – Everyone completing this trek will be required to camp in a tent. These will be two person tents which you can share with a friend or, alternatively you will be allocated someone of the same sex to share with. You can also request a single tent at an additional cost. I had no problem sharing with another lady on the trek and we ended up becoming good friends by the end of it.
- Toilet and Shower Facilities – There are concrete shower and toilet blocks at each camp. The showers do not have hot water and the toilets are drop toilets. Be sure to carry some toilet roll with you in case some isn’t supplied.
- Food – I was really impressed by the food on this trek. As a vegetarian I was worried there wouldn’t be much choice for me but I was wrong. We were provided with freshly prepared 3 course meals every evening and were given something different every day. Food included salads, pasta, soups, stir fries, rice, chips and even pizza! Each meal would be rounded off with desert and they even managed to miraculously bake a birthday cake on the last day. I have no idea how.
- Drinking Water – You will be provided with treated drinking water every morning. Be su redo fill up your bottles before heading out every day.
- Bring your passport – You passport will be checked at KM82 at the beginning of the hike when entering the national park. You can also get your passport stamped at the end of the trek with a Machu Picchu stamp marking your accomplishment. Just be sure you don’t stamp over any visas/ important pages as this may invalid your passport!
Conclusions
I met some fantastic people from all walks of life on this trek and we really bonded over the 4 days. Being disconnected from wi-fi and building a camaraderie with my fellow hikers, sleeping under the stars and being in nature was a really grounding experience.
It was refreshing having real conversations, without the distractions of technology or the outside world. The encouragement we gave each other to keep going on difficult hiking days and the collective excitement of arriving at Machu Picchu together was a truly beautiful and heart-warming experience.
Hiking the Inca Trail also almost feels like a rite of passage – a journey you need to undertake in order to have earned the privilege of finding the pot of gold at the end of the rainbow. It allowed me to experience the various ecosystems, nature, local flora and fauna and the stunning scenery of the region – something I would have missed if I arrived by train for the day.
Having Peruvian guides by my side allowed me to learn about the local customs, traditions and Inca history in the region from indigenous locals with Incan ancestry.
Very few experiences fill me with a sense of overwhelming gratitude, nostalgia and longing to return as my 4 days hiking the Inca Trail. It was truly a once in a lifetime experience made special by my fantastic guides and porters, fellow hiking companions and the stunning backdrop of the Andes mountains.
Rather surprisingly, Machu Picchu itself was not the highlight of my Peru trip, it was the trek and the time leading up to our arrival at the ruins that made the experience so spectacular ringing true to the saying it is about the journey and not the destination…
For more travel inspiration to help plan your trip to Peru and South America check out my other blogs:
22 Unforgettable Days Travelling Through Peru
The Inca Trail vs The Lost City Trek: Which Trek to Complete in South America

This website certainly has all the info I needed concerning this subject and didn’t know who to ask.